★★★
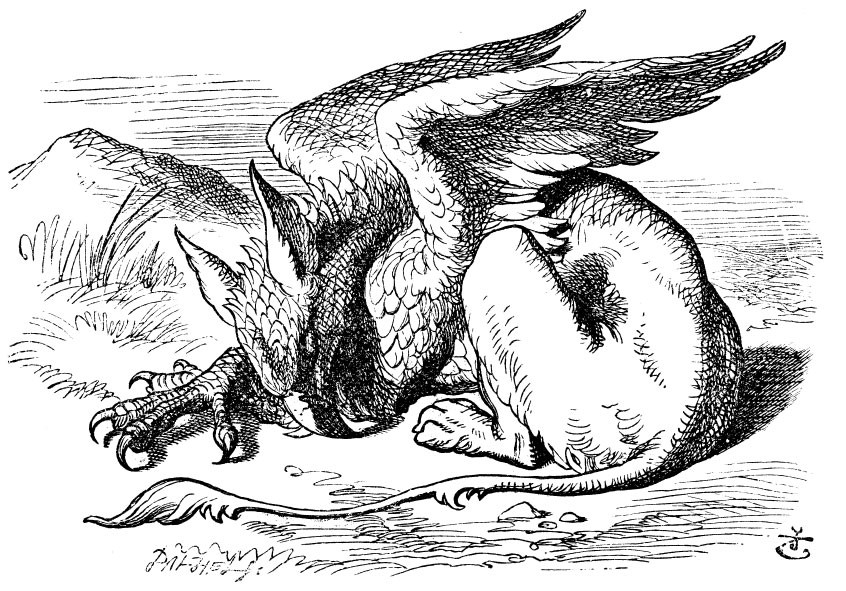
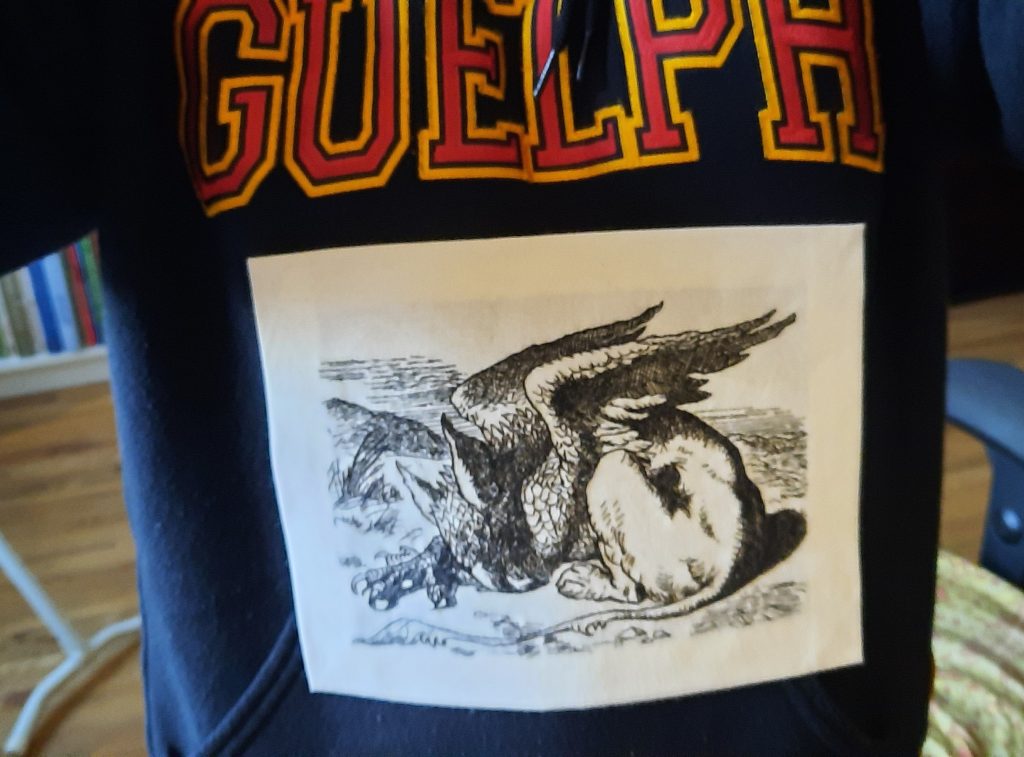
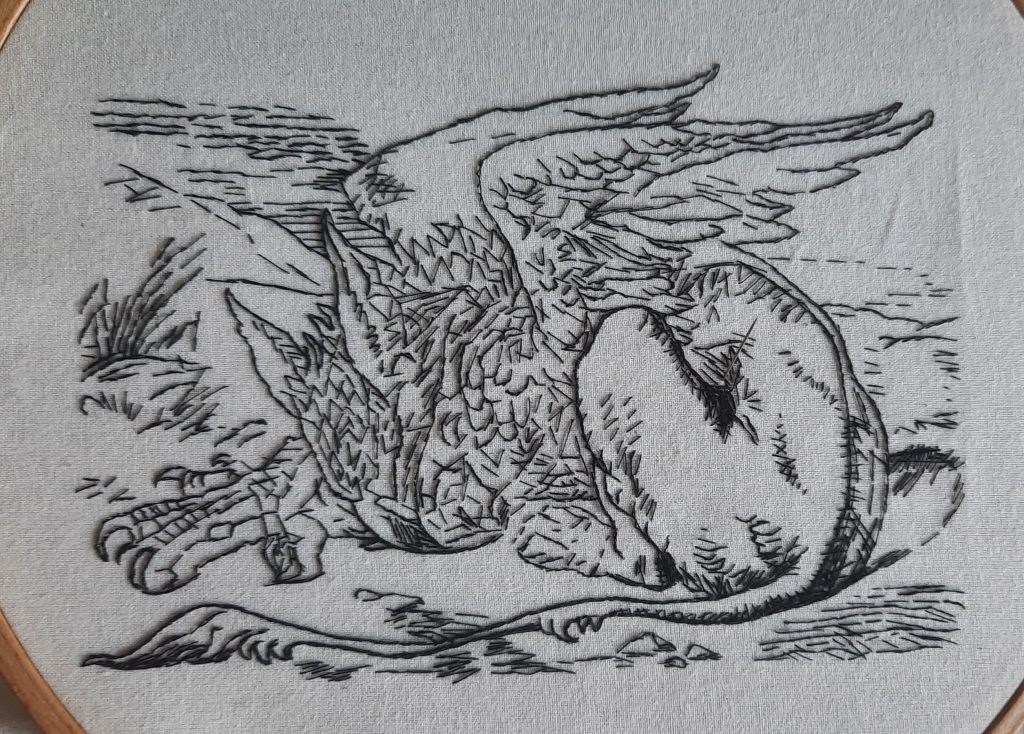
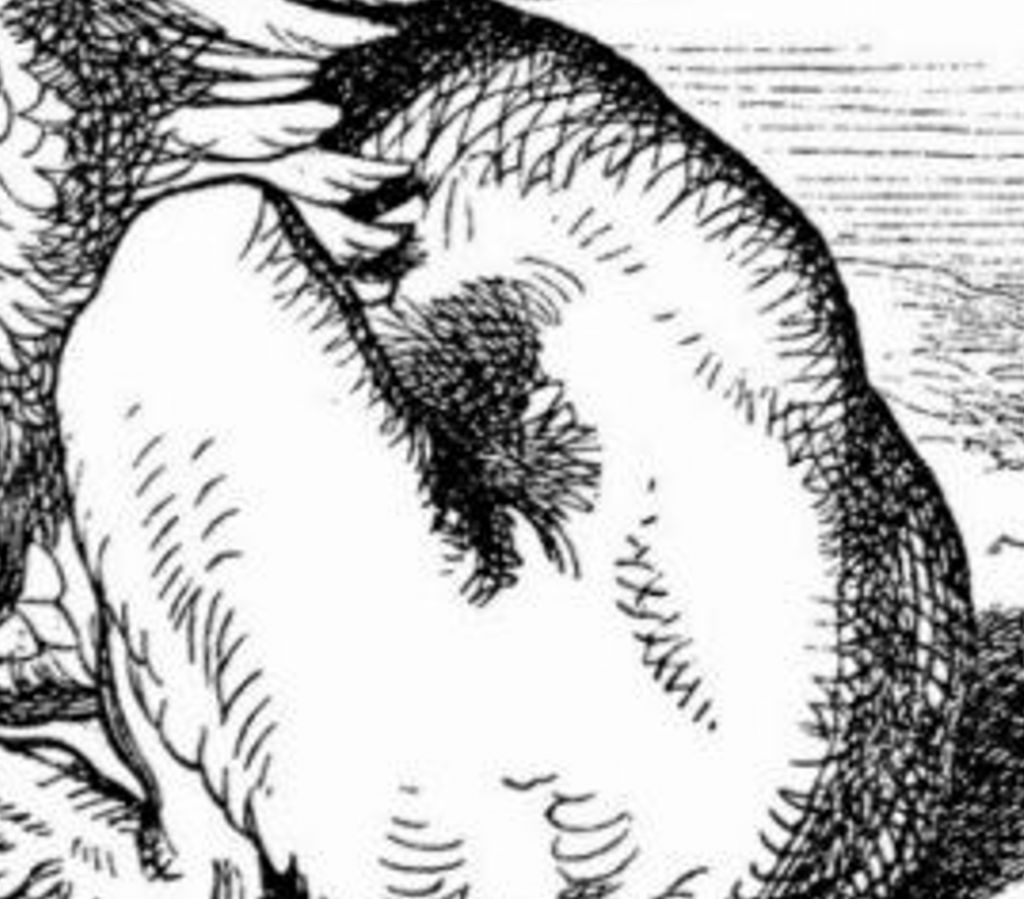
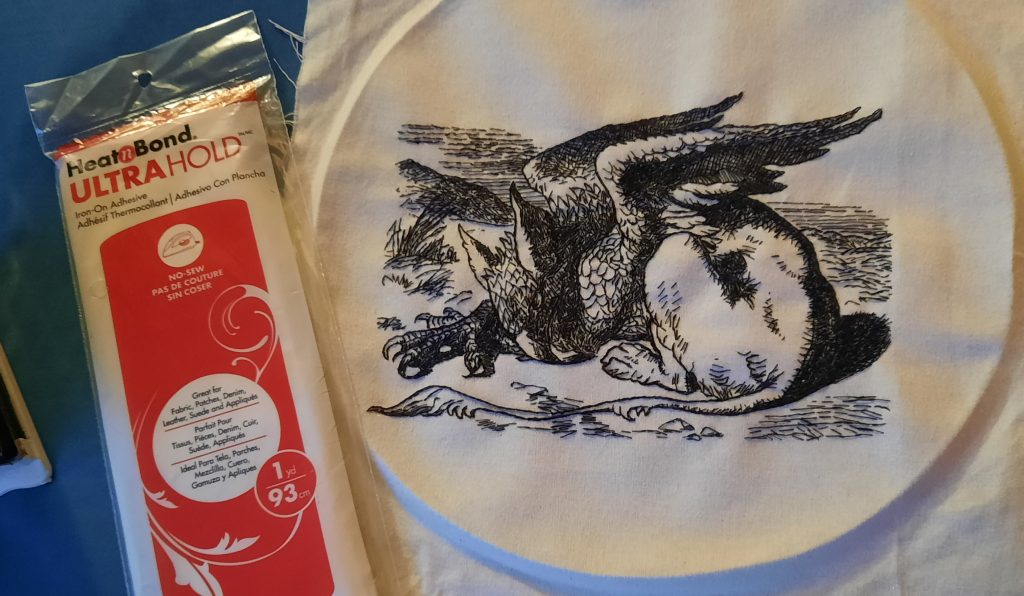
Being a UGuelph student, I thought it would be cool to embroider a gryphon, and thought this image would be a fun challenge. This particular illustration is by Sir John Tenniel, the iconic cartoonist who created the famous drawings depicting elements of Alice’s Adventures in Wonderland by Lewis Carroll.
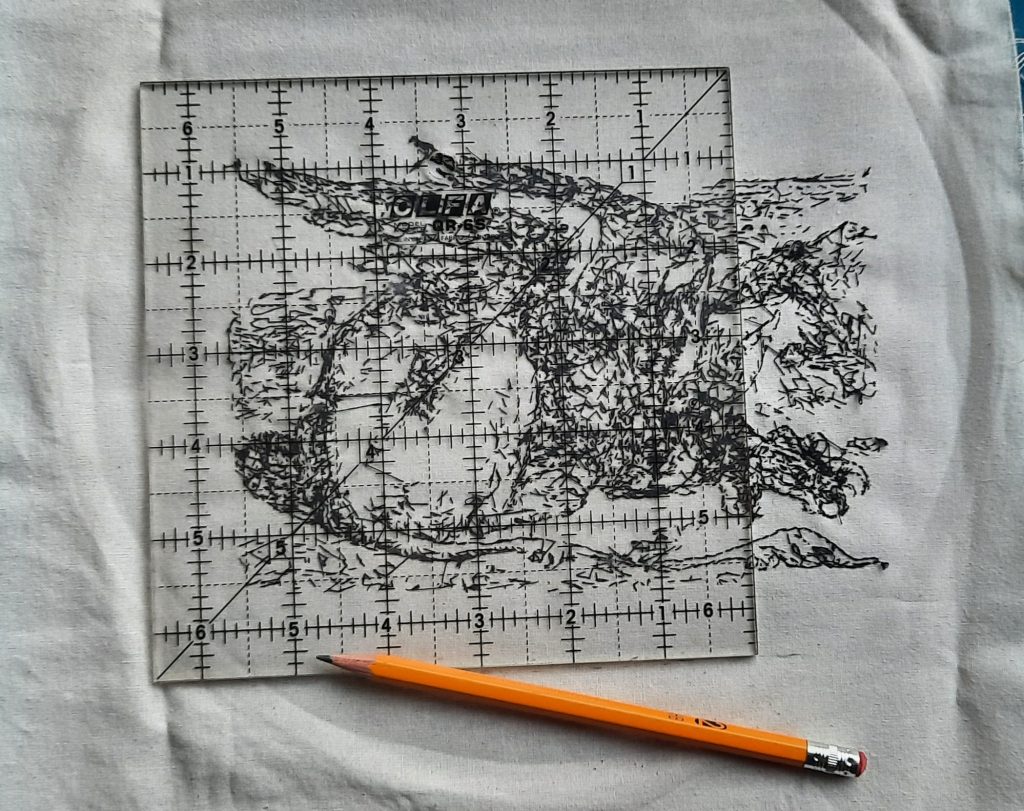
Since I don’t have any proper tracing paper for embroidery, I had to get creative and use something else, and in this case, white tissue paper for gift wrap. I taped it to my laptop screen and traced Tenniel’s image because I was not going to try to draw it by eye. I used a black ballpoint pen because after the ink dries, it shouldn’t smudge onto the fabric below, and the line itself is fairly small and light. I only traced the lines required for outlining its general form, and left the shading to be done by eye after the outline is finished.
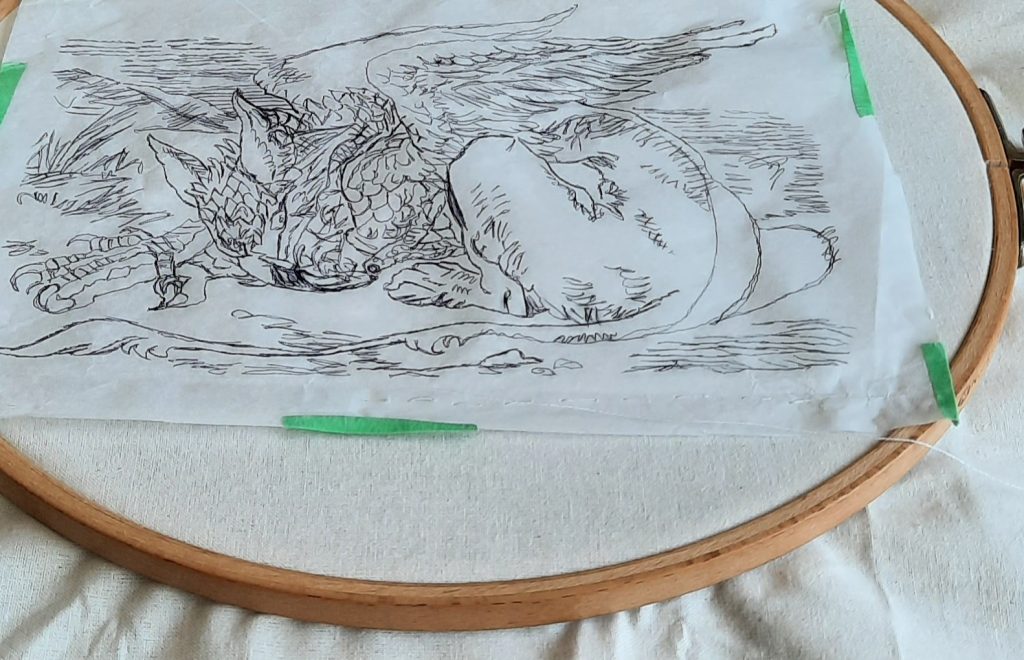
Once I was happy with my drawing, I sewed it to the fabric with a large running stitch around the perimeter to keep it secure. It didn’t lay completely flat, but it turned out to be okay as long as it was pressed down in the area that was being worked on.
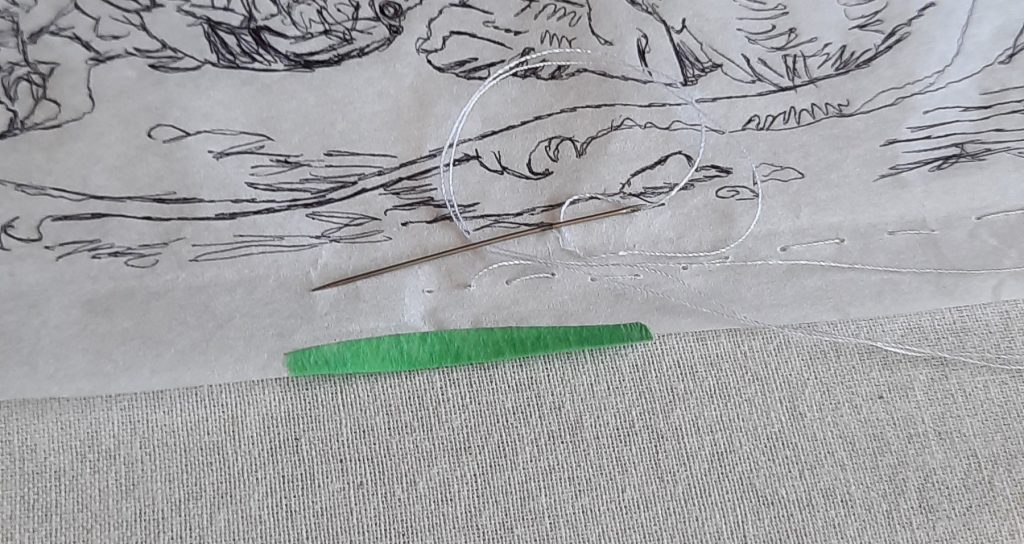
To make sure it the image didn’t warp because of this paper bubble, I worked on different sections close to the outer edge before filling in details like feathers. I began by focusing on the tail, wings, knee, back, and ears using a combination of outline and back stitching. I could help but give the tissue a test-rip before it was done, just to make sure pulling it away wasn’t going to mess up the stitches too much.
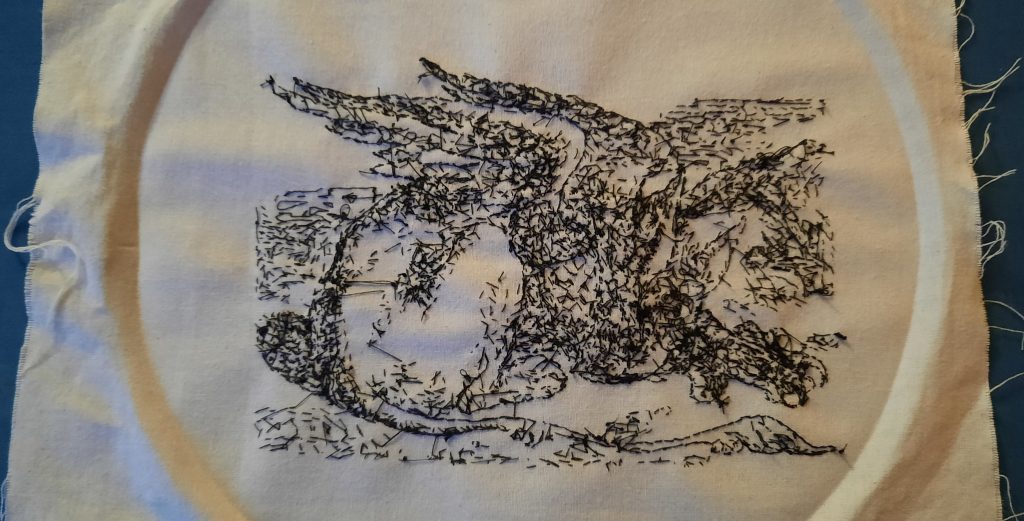
Due to the amount of detail in this image, I ended up using regular ol’ black thread (from the dollar store no less) instead of embroidery floss, as thread creates a thinner line than floss. Sure, you could split a single strand of floss in half, and for some aspects of the image it might be a good idea, but thread is abundant and cheap.
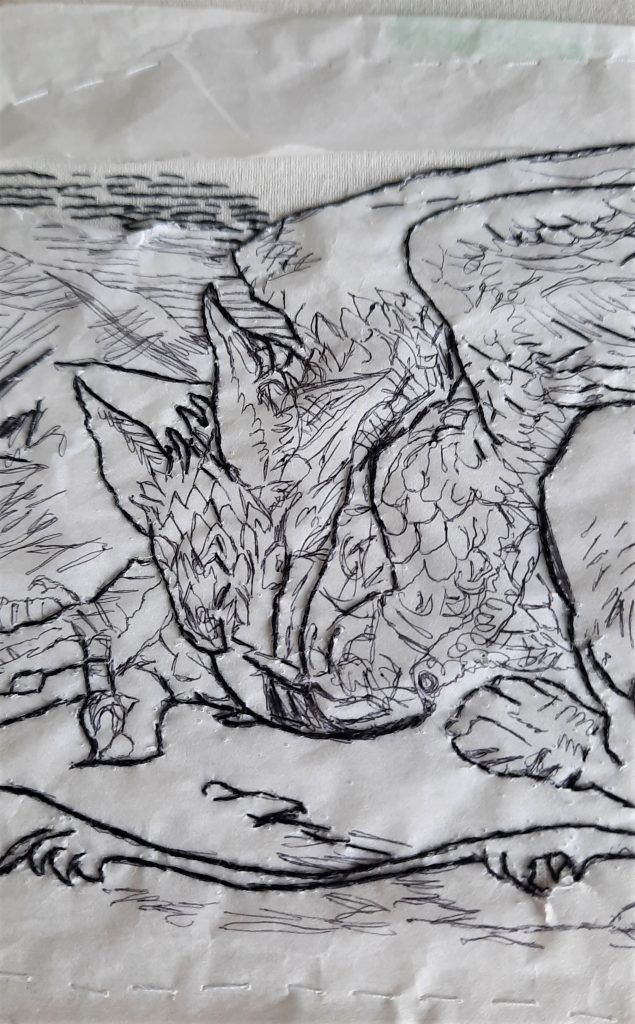
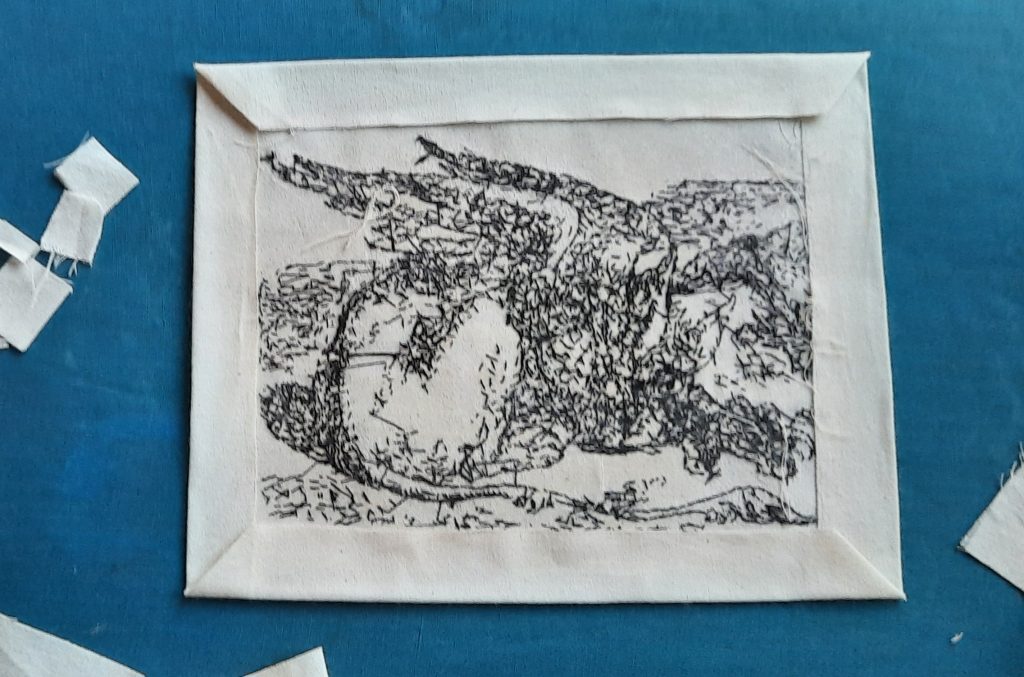
Below, you can see how the general outline is almost done, and most of the paper has been removed. There’s just a little bit left on the wings and shoulder, and by this stage, my head was spinning. So many lines, so sick of lines. Also, while embroidering through tissue paper was giving off super ASMR vibes at first, by the end, the crinkling sound was making me go crazy.
After finishing all the lines and removing the paper, put it down and worked on something else for a while. Now that I’m not sick of looking at it, I started cleaning up my lines and adding some shading. I basically pick an area of the image to work on for the day, zoom in, and go by eye. I started at the tail and did a second outline stitch over top of the first one, securing and “averaging out” the line I created from working through the paper. While I was down there, I also did the ground and rocks, working left to right and eventually up his back. You can see I left my needle at his hip, and just how much work there is to be done in this area.
Anyway, I’m not sure how long this will take, but I can imagine I’ll be working on it over the fall and winter. I’m still not sure what I’ll do with it when it’s finished, but for now, I’m thinking of putting it on a Guelph shirt. It would also make a good tote bag, but I’m not sure I want nor need another tote bag. There will be plenty of time to make a decision, and maybe a new opportunity will present itself.
★★★
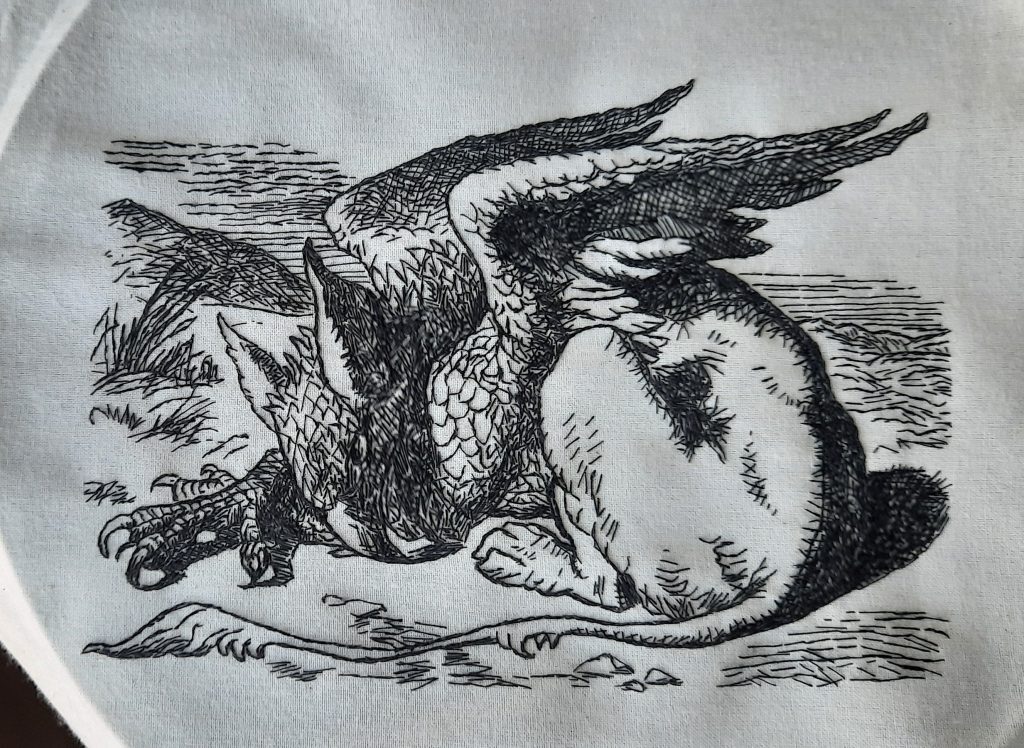
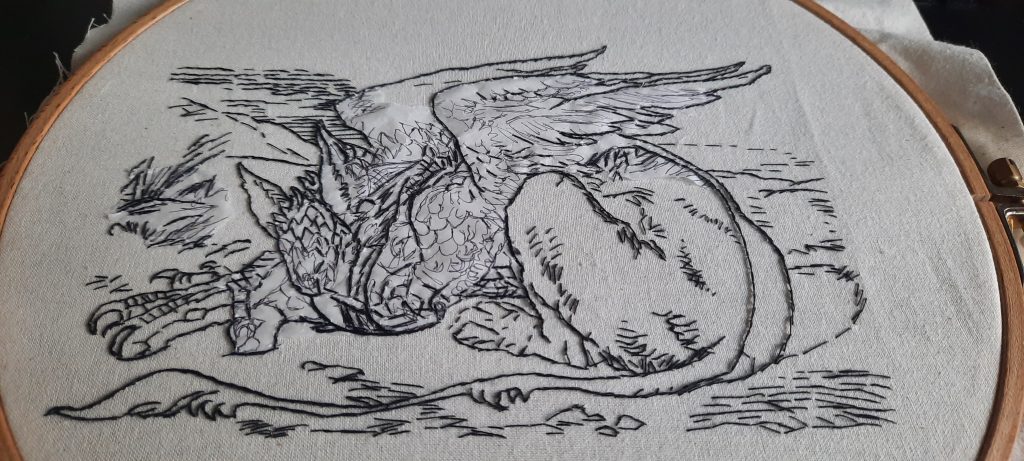
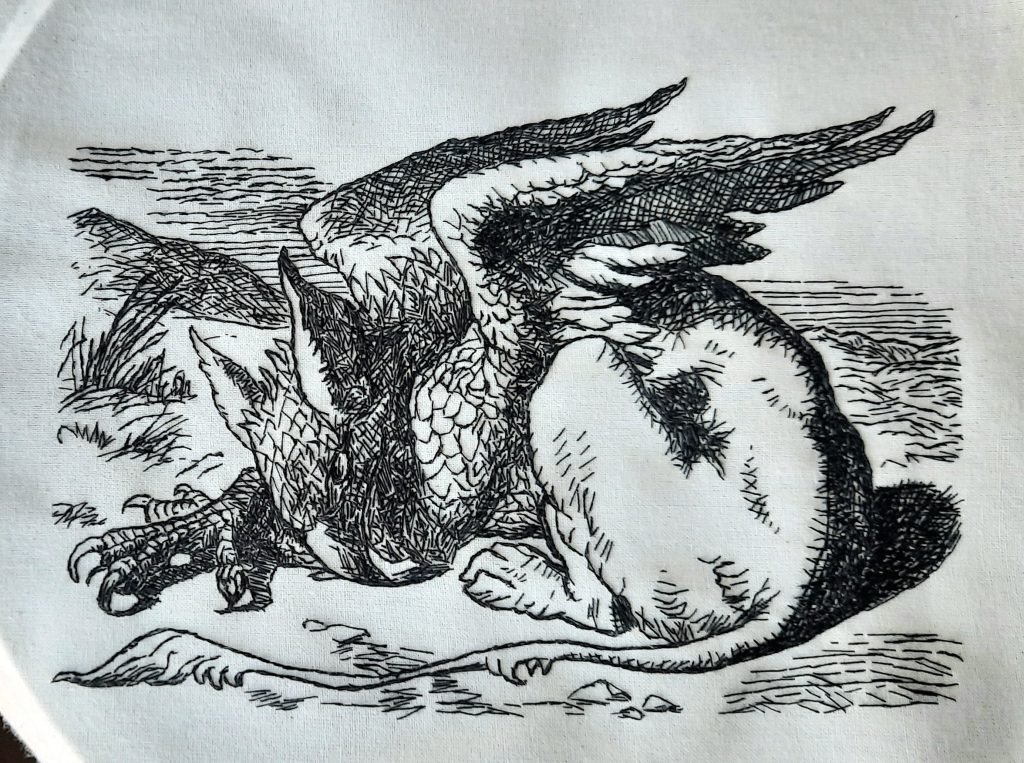
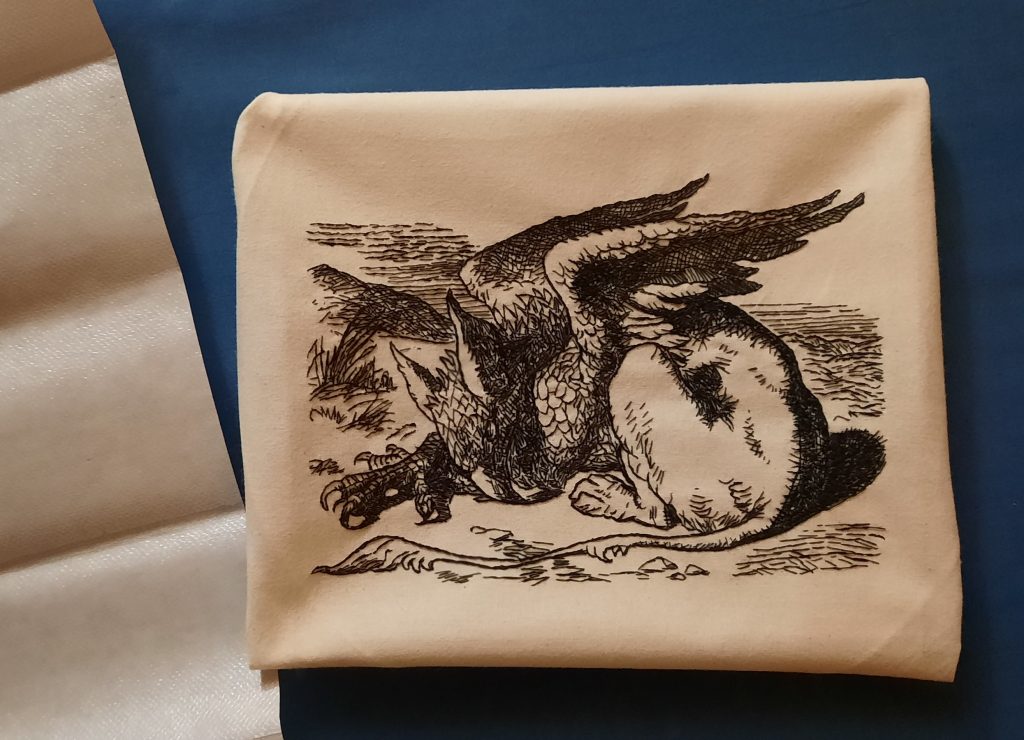
There was at least one long period of time that I did not work on it at all. It became really tedious at about the half-way point and I needed to take a break for a few months. A year and five months later, it is finished!
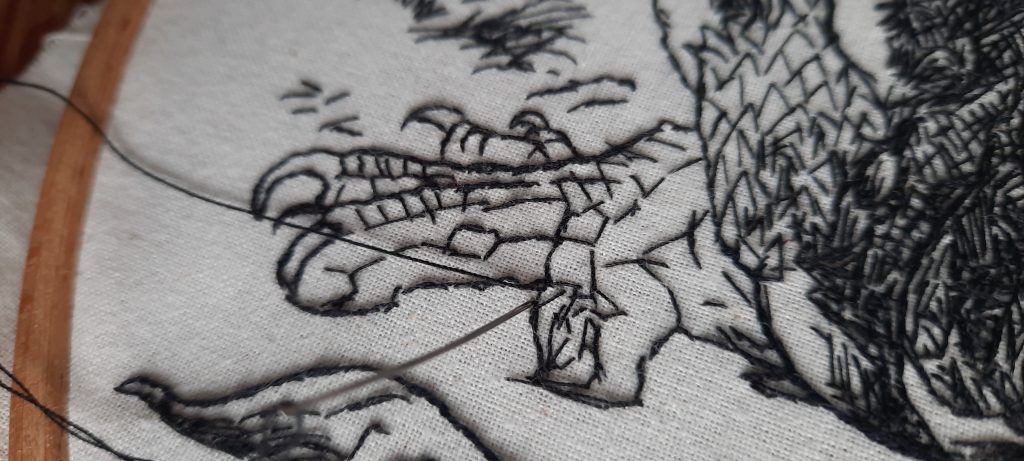
Here’s the front foot before it was filled in:
Now, it needs to be ironed and the edges folded under to create a backing. I will use some Heat n Bond fusing to keep it all together and help secure the stitches. I’m still not sure what I will do with it, but now that it’s done, I am more inclined to protect it from wear and damage.
It took a bit of testing to determine how much space to leave between the edge of the stitches and edge of the fabric. I decided upon 2cm.
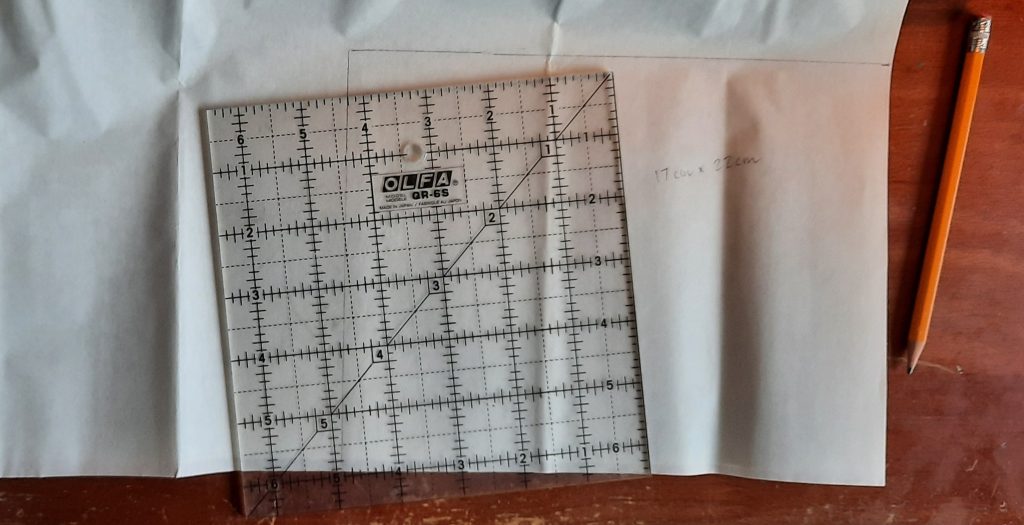
Cutting out the Heat n Bond to dimensions which include a 2cm margin from the stitching. It happens to come to 17cm x 22cm.
I added lines to the reverse side of the fabric to use in lining up the adhesive rectangle:

Trimming the excess fabric is important because it does show through the other side.
I decided that I will find a frame for it because it would benefit from remaining behind glass. I will likely attach a piece of white paper to this empty square to increase contrast when viewed from the other side. In the next two pictures, you can see how a dark background bleeds through, so a white backing is ideal.
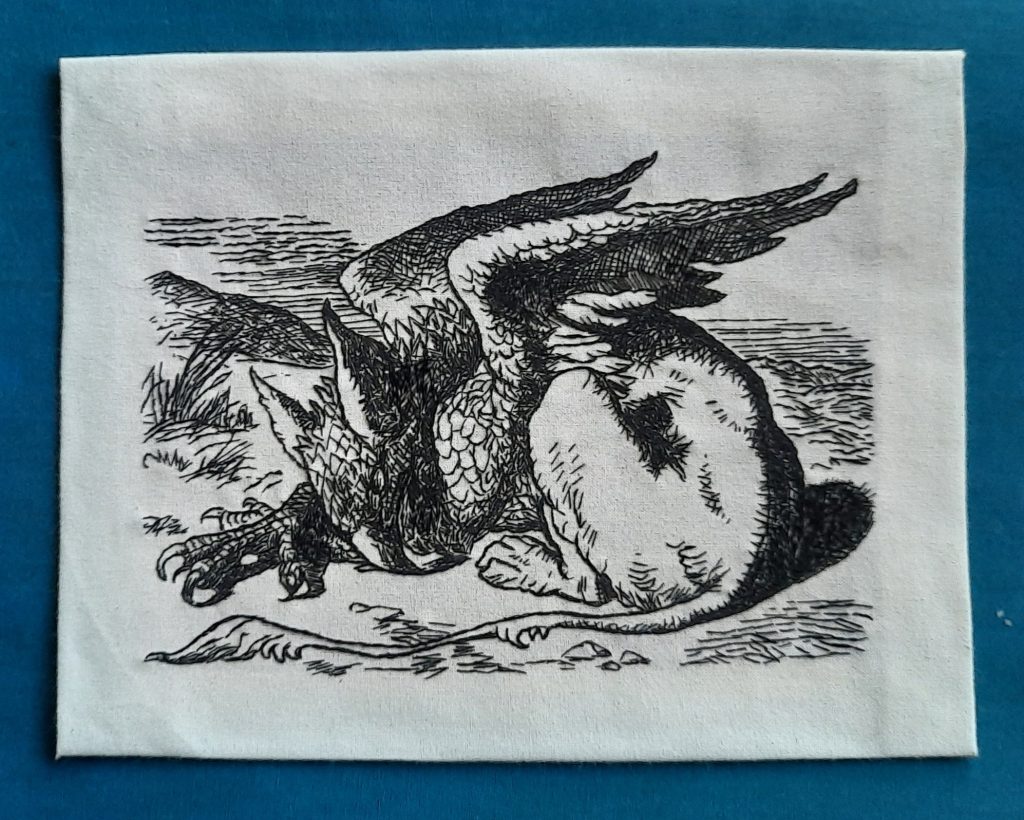
Go Gryphons!